Today, I’m reviewing one of the most-requested products of 2024: the Ninja Slushi (stylized as NINJA SLUSHi, with a lowercase “i”). This is the latest addition to Ninja’s growing lineup, following the success of the Ninja Creami and Ninja Thirsti, both of which I found to work well. Let’s see how this newcomer stacks up.
NINJA SLUSHi REVIEW
As one of the hottest items this year, the Ninja Slushi has been tricky to get my hands on. It was sold out during several of my attempts to purchase it directly from Ninja, but I eventually snagged one for $300. For those unfamiliar with my reviews, I don’t take sponsorships—I buy all the products I review at full price to ensure an unbiased perspective.
Where to Buy
I picked up the Ninja Slushi direct from the Ninja website, for $299. Although it’s also listed on Amazon, I found the prices there to be significantly higher, so for now, the official website is your best bet.
What’s in the Box?
Unlike some of Ninja’s other appliances, the Ninja Slushi is fairly straightforward when it comes to parts. Inside the box, you’ll find the base unit (which houses the evaporator and motor), a vessel for holding drinks, a removable auger, a condensation catch, and a drip tray. Additionally, it comes with an instruction manual, a recipe guide, and a quick-start guide. The front panel features five preset buttons (Slush, Spiked Slush, Frappé, Milkshake, and Frozen Juice), along with temperature control, rinse, and power buttons.
Overview
The Ninja Slushi is designed to create frozen drinks without the need for ice, thanks to its built-in evaporator. As the drink is moved across the evaporator by a spinning auger, it freezes to the selected temperature, allowing you to control how thick or “sippable” your drink will be. There are five preset options that automatically adjust the thickness, though you can manually tweak the temperature as well. The unit holds up to 64 oz of liquid, enough to make around eight servings at once.
All of the tests below used recipe portions for 2-3 servings, with the exception of the frozen juice recipe, where I added a bit extra.

Test 1: Basic Soda Slush
For my first test, I went with a simple soda slush using regular Coke. It’s important to note that sugar is required for slushies to form, so diet sodas won’t work. I poured three cups of regular Coke into the vessel and selected the “Slush” preset.
According to the instructions, the unit should beep once it reaches the optimal temperature, but I didn’t hear anything during this test. It’s possible I missed it, or perhaps it hadn’t fully reached the target temperature. I did notice the unit hovering just below the optimal temperature for a while, with the LED light pulsing to indicate that it was still working toward it.
Despite this, after 20 minutes, I dispensed the drink and ended up with a perfectly made Coke slushie—just as good as what you’d find at a convenience store. The texture and temperature were spot-on. This was an easy first test, so I was excited to move on to more complex drinks.

Test 2: Spiked Slush
Next, I decided to try a spiked slush. The quick-start guide included a recipe for a Mango Margarita, but since I couldn’t find mango mix, I opted for a regular margarita instead. The recipe called for two cups of margarita mix, 1/3 cup of water, 1/3 cup of lime juice, and 1/3 cup of tequila. I poured everything into the vessel and selected the “Spiked Slush” preset.
After about 19 minutes, the unit beeped to indicate it had reached the optimal temperature. The result? A perfect frozen margarita, just as good as the pricey ones you’d find here in Las Vegas.
One bit of Ninja trivia: the beep that signals the optimal temperature is the same one used by the Ninja Foodi Oven when it finishes preheating. The first time I heard it, I thought, “Wait, I know that sound!”

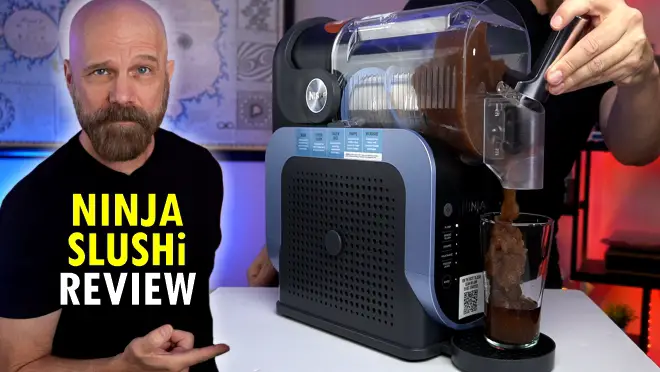
Test 3: Coffee Frappé
For my next test, I followed the recipe guide’s instructions for a coffee frappé. The recipe called for 1 cup of half & half, 2 cups of black coffee, 1 teaspoon of vanilla extract, and 1/3 cup of granulated sugar. Since the unit has a warning sticker advising against hot liquids, I brewed the coffee in the morning, dissolved the sugar while it was still hot, and then let it chill in the fridge for the rest of the day. Once everything was cooled, I mixed the ingredients, poured them into the vessel, selected the “FRAPPÉ” preset, and adjusted the temperature a few notches higher.
At first, the mixture looked very foamy, but over time it started to resemble a milkshake. By the 30-minute mark, the machine was still just below the optimal temperature, but I decided to dispense the drink anyway. It turned out perfect—the texture and taste were spot-on. Having gone through a phase of regularly buying frozen drinks like this in the 2010s, I can confidently say that this frappé was just as good as those I used to pay a premium for back then.

Test 4: Milkshake
The preset I was most excited about was the milkshake. I used another one of their recipes, which called for 2 cups of whole milk, 1 cup of heavy cream, 1 teaspoon of vanilla extract, 2 tablespoons of sugar, 1/4 cup of chocolate syrup, and 2 tablespoons of cocoa powder. After whisking everything together and pouring it into the unit, I selected the “MILKSHAKE” preset and started my stopwatch.
After 20 minutes, the unit beeped, indicating it was ready to dispense. The texture was perfect, and the recipe produced a delicious milkshake.
For those who prefer using tall glasses for milkshakes, I measured the distance between the spout and drip tray—it’s 7 inches. If you remove the drip tray, you gain an extra half inch of clearance.

Test 5: Frozen Juice
The final preset is designed to create simple frozen juice slushies. For this test, I decided to experiment by comparing the results at both the lowest and highest temperature settings. I poured in some fruit juice—slightly more than the other recipes since I planned to dispense some halfway through—and started with the “FROZEN JUICE” preset on the lowest setting. After about 12 minutes, the slushie was ready, and it had a nice, smooth texture.
Next, I cranked the temperature to the highest setting and waited. Over an hour later, it was finally done, but the result was almost solid, more like a frozen block than a slushie. While it’s nice to know that this setting is an option, I don’t imagine many people would want to wait that long for such a dense texture. The default (lowest) setting seems much more practical, producing a perfect slushie in just 12 minutes, which is far more reasonable than waiting over an hour for clumpy juice.

Cleaning
There are two main steps for cleaning the Ninja Slushi, both of which I performed after each use. First, you run a rinse cycle by filling the vessel with 64 oz of warm water, selecting the “RINSE” preset, and dispensing the liquid. While this does a good job of starting the cleaning process, it doesn’t leave the unit completely clean.
The second step is disassembling the unit and hand-washing the vessel, auger, and catch tray with warm, soapy water. I also wiped down the base unit with a damp sponge. Neither process is difficult or time-consuming, so I didn’t find cleaning to be a negative at all.
Pros
- Easy to use
- Easy to clean
- Quiet operation
- Well-made
- Excellent instructions
- Performs as advertised
Cons
- Price
- Inconsistent times to complete drinks
- Occasional difficulty dispensing
Conclusion
At first glance, spending $300 on a slushie maker might seem extravagant, but the fact that this product is consistently sold out suggests that there’s a market for it, even at this price point. While not everyone will be willing to make that investment, those who do are likely to be satisfied with their purchase. If you’ve tried the Ninja Slushi or a similar product, I’d love to hear your thoughts in the comments below.
Video Review
Check out my full video review below.
Also sold at Dillard’s. If you want a smaller version can purchase the Iceman Slushi Machine for around $249. Does a 1/3 less but also much smaller. Both work about the same. Really enjoyed your review and will watch for more.
Thanks for the info! And I’m glad you enjoyed my review!
سلام عليكم
أنا اشتريت سلش يا أخي الفاضل إلى الآن ما استلم ها ودفعت 299 ريال عليها عرض
وقالوا لي عن شركة إيكو حواصل وا معاك
Hello, thank you for your comment. I don’t sell this product myself. I only tested it and shared my review. If you purchased it from a store or website, I recommend reaching out directly to the seller or the delivery company they mentioned to check on your order. I hope you receive your item soon!
مرحباً، شكراً على تعليقك. أنا لا أبيع هذا المنتج، أنا فقط جربته وشاركت مراجعتي. إذا اشتريته من متجر أو موقع، أنصحك بالتواصل مباشرة مع البائع أو شركة التوصيل المذكورة لمتابعة طلبك. أتمنى أن تستلم منتجك قريباً!