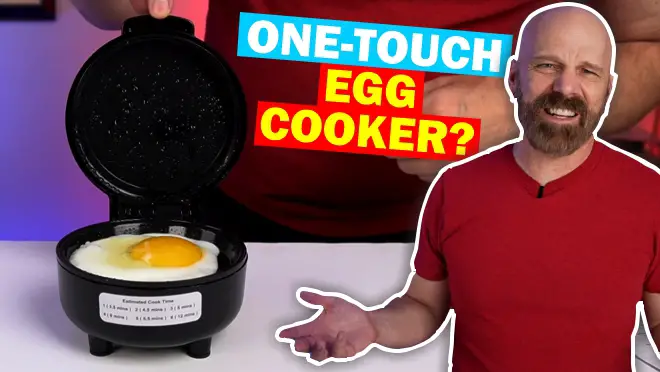
Welcome back, everyone! Today, I’m diving into another egg gadget—the Hyvance Smart Fried Egg Cooker. As someone who can’t resist trying out new egg gadgets, I had to get my hands on this one, which promises to cook eggs in six different styles. Let’s see how well it works in today’s review!
Hyvance Smart Fried Egg Cooker Review
Note: This is the written version of my review, which I may update after posting the video review. You can watch the full review on my YouTube channel. I’ll continue to use the Hyvance Smart Fried Egg Cooker and update this page with any new findings or changes over time.
Where to Purchase
I bought the Hyvance Smart Fried Egg Cooker for $40 on Amazon, where it currently has a 4.3-star rating. The packaging includes the main unit, a spoon-like utensil for lifting eggs out of the cooker, and some instructions. At first glance, the design of the unit reminded me a bit of the Dash mini waffle maker or the Hamilton Beach breakfast sandwich maker.
First Impressions
Hyvance claims you can say goodbye to frying pans with this smart egg cooker. It promises perfect yolk styles every time with six different settings, from sunny side up to well done with two eggs. All you need to do is add a little oil, add your egg, press a button, and the cooker will stop when the egg is done. The surface supposedly has an indentation to keep the yolk in the center, which is a nice touch.
Testing the Settings
I decided the best way to test this out would be to go through all six settings and compare my stopwatch with their stated times and see how the final product looked.
Sunny Side Up
I started with the sunny side up setting, which – according to the times listed on the front of the unit and the Amazon listing – should take 3.5 minutes. After setting my stopwatch, I was curious to see if the stated time was accurate. Surprisingly, it beeped at 3 minutes and 8 seconds, and the egg seemed slightly undercooked for my taste. It didn’t go the full 3.5 minutes as promised, leaving me unimpressed with the first test.
Half Runny Yolk
Next, I tried the half runny yolk setting, which is supposed to take 4.5 minutes. This time, the egg cooked for 3.5 minutes and looked quite different from the sunny side up attempt. Cutting into the egg, it was partially runny but not quite half runny as advertised. Bailey, my golden retriever, was very interested in the smell! I would say this was roughly “half runny” so I’d call this result a success.
1/5 Runny Yolk
Moving on to the 1/5 runny yolk setting, the egg cooked for 4 minutes and 38 seconds (vs a stated time of 5 minutes). The result was slightly runny, more like 1/10th runny rather than 1/5th. Still, it wasn’t terrible.
Well Done
For the well-done setting, which should take 9 minutes, the egg cooked in 8 minutes and 38 seconds. The yolk was completely cooked through, and I would say this setting delivered as promised.
Well Done (Broken Yolk)
The well-done (broken yolk) setting, which should take 5.5 minutes, delivered a perfectly cooked egg in 5 minutes. The broken yolk was well done, and I had no complaints about this setting.
Well Done (Two Eggs)
Finally, I tested the well-done (two eggs) setting, which should take 12 minutes. At first I worried that the eggs might overflow as they filled the unit to the brim, although thankfully that did not happen. The cooker ended at 11 minutes and 38 seconds, and both eggs were well done, and slightly brown on the bottom side.
Retesting Sunny Side Up
I decided to retest the sunny side up setting now that the unit was warmed up – since it was undercooked the first time. Interestingly, after the unit had warmed up, it cooked the egg better in 2 minutes and 34 seconds. The yolk was nicely runny and the whites were fully cooked, indicating that the cooker performs better once warmed up. There is no preheat feature, but it seems to me that such an addition might help deliver more consistent results.
Conclusion
The Hyvance Smart Fried Egg Cooker is a mixed bag. It does work for most of the settings, although the times aren’t always accurate. The lack of customization for cooking times is a downside—having a plus and minus button to tweak the settings would be a great improvement. At $40, it’s not necessarily better than using a traditional pan, however, the convenience of setting it and forgetting it can be appealing, especially if you want to multitask.
I’ll continue using it to see if it grows on me over time. If you’ve tried this product or something similar, I’d love to hear your thoughts in the comments.
Video Review
Below is the full video review where you can see this in action.


